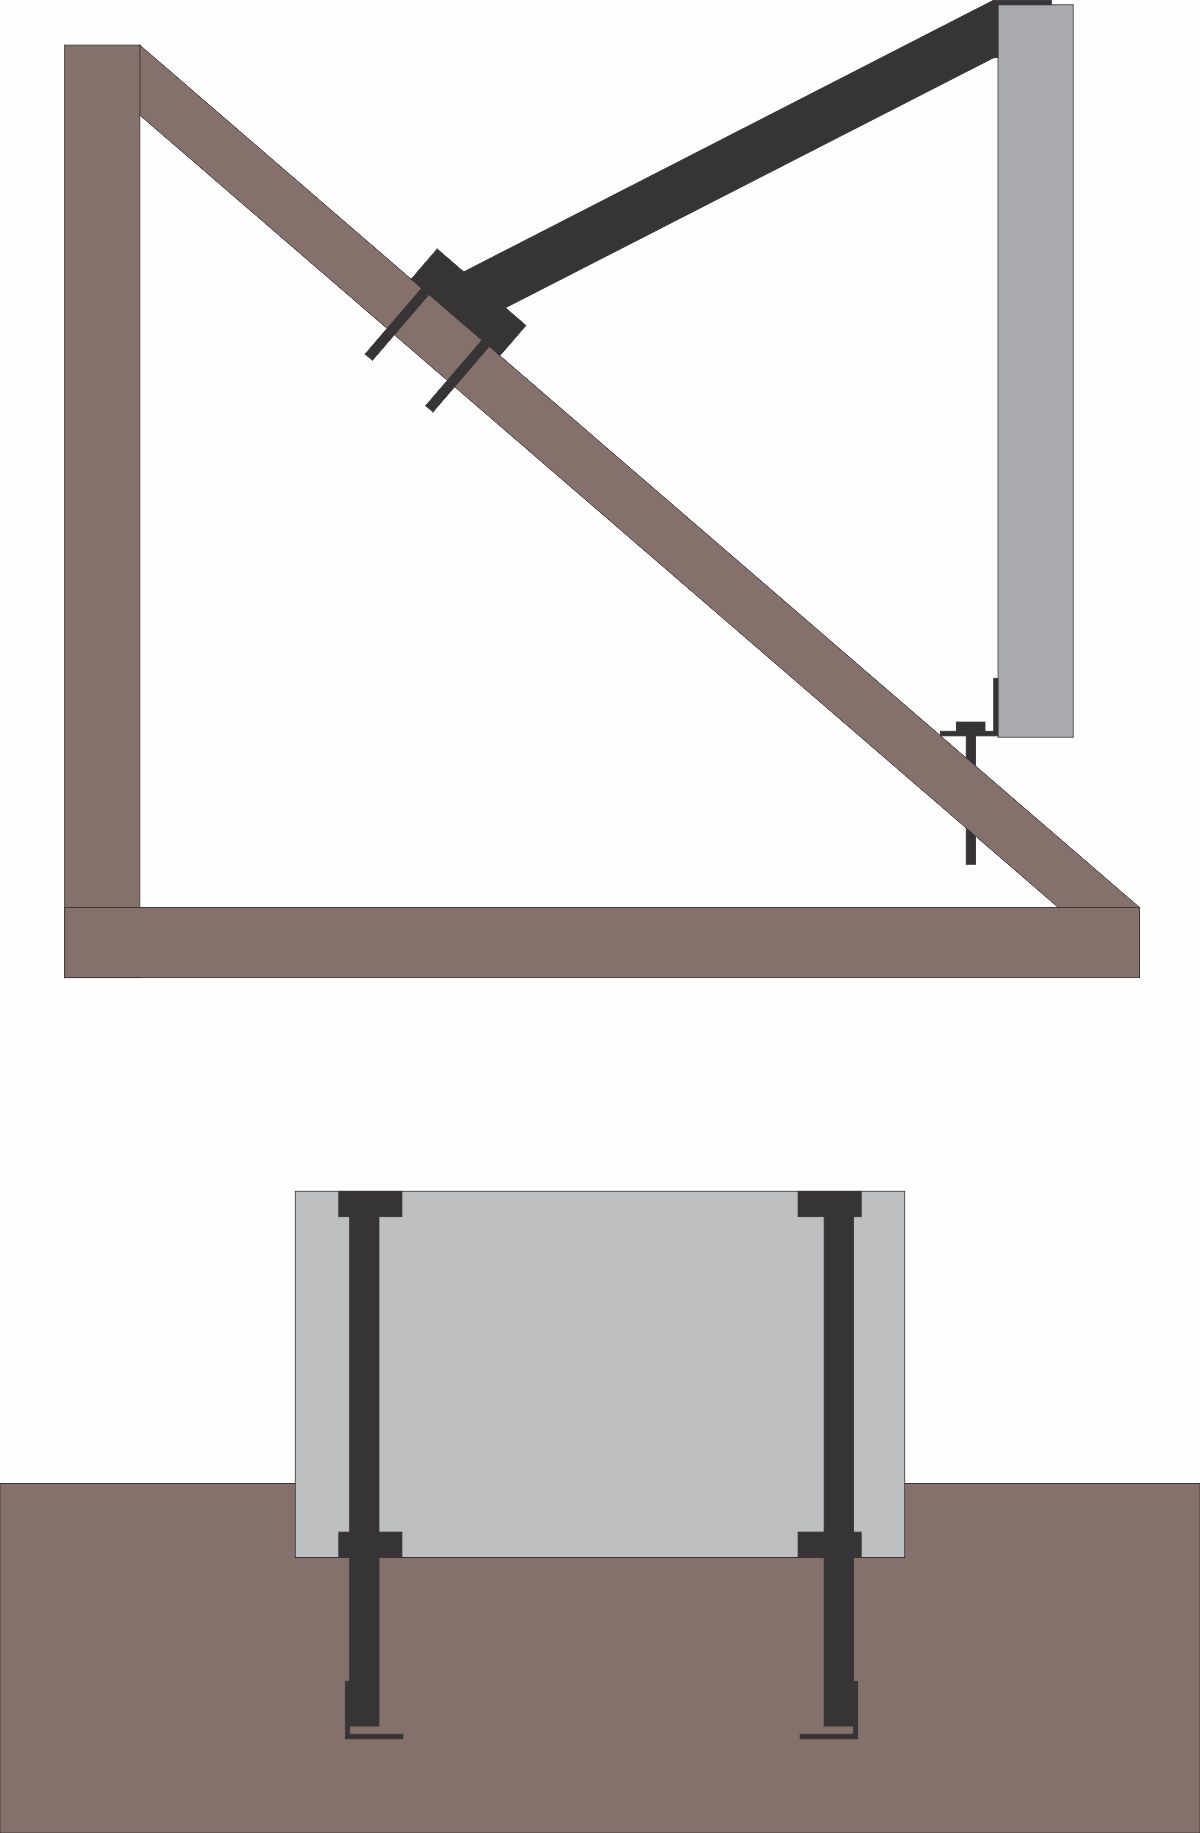
Pitch Roof Sign Installations
Pitch Roof Sign Installations
Pitch roofs present a unique challenge when installing a vertical sign on a sloped surface. The following steps outline the process for a secure and stable installation.
Step 1: Prepare the Frame and Materials
Once the sign frame (steel frame or lighted cabinet) is fully assembled, cut (4) pieces of 2” steel angle, each 4” long. (For steel frames, only 2 pieces are required). For signs up to 4’x8’, four contact points (2 at the top and 2 at the bottom) are sufficient. For signs longer than 8 feet, consider adding a third set of angle pieces in the center for additional wind support. Cut (2) additional pieces of angle the same size and set them aside for Step 6. You will also need (2) long pieces of angle or 2” square tubing (3 if center support is used). These should be longer than the height of the sign—ensure to have extra material on hand as the exact length will be determined onsite. Paint all steel pieces black.
Step 2: Attach Bottom Angles
Attach (2) angle pieces to the bottom of the frame, approximately 8-10 inches from the outer edge. For aluminum lighted sign cabinets, use heavy-duty self-drilling screws, ensuring (2) screws per side of angle, totaling (4) screws per 2” angle piece. For steel frames, weld the angles directly to the frame.
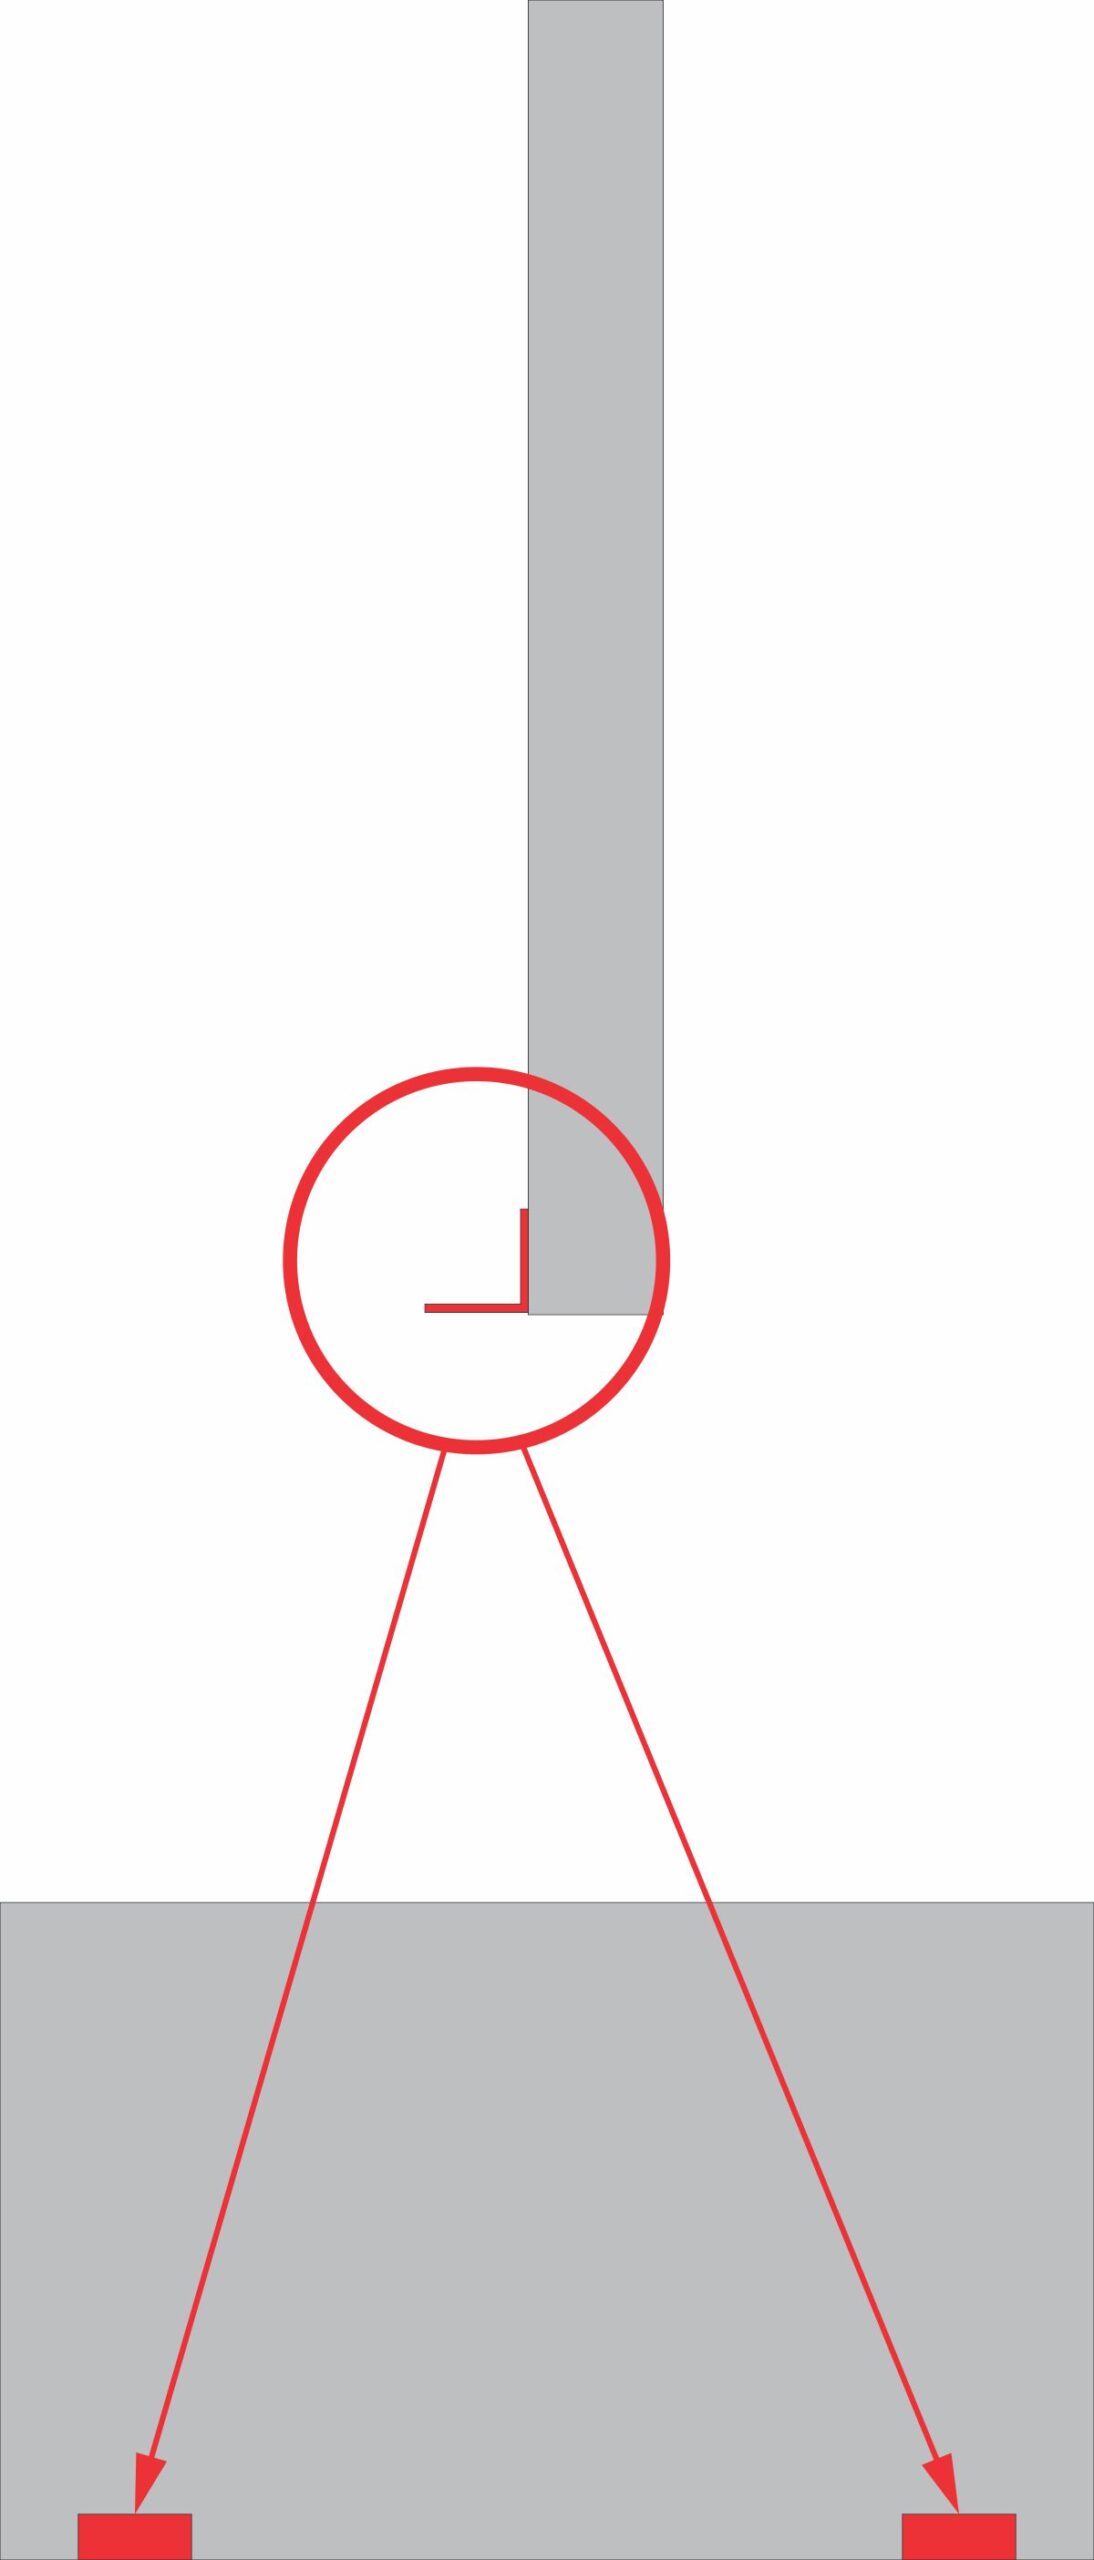
Step 3: Attach Top Angles
Repeat Step 2 for the top of the frame, ensuring the angle pieces are flush along the top edge. For steel frames, welding directly to the frame is recommended.
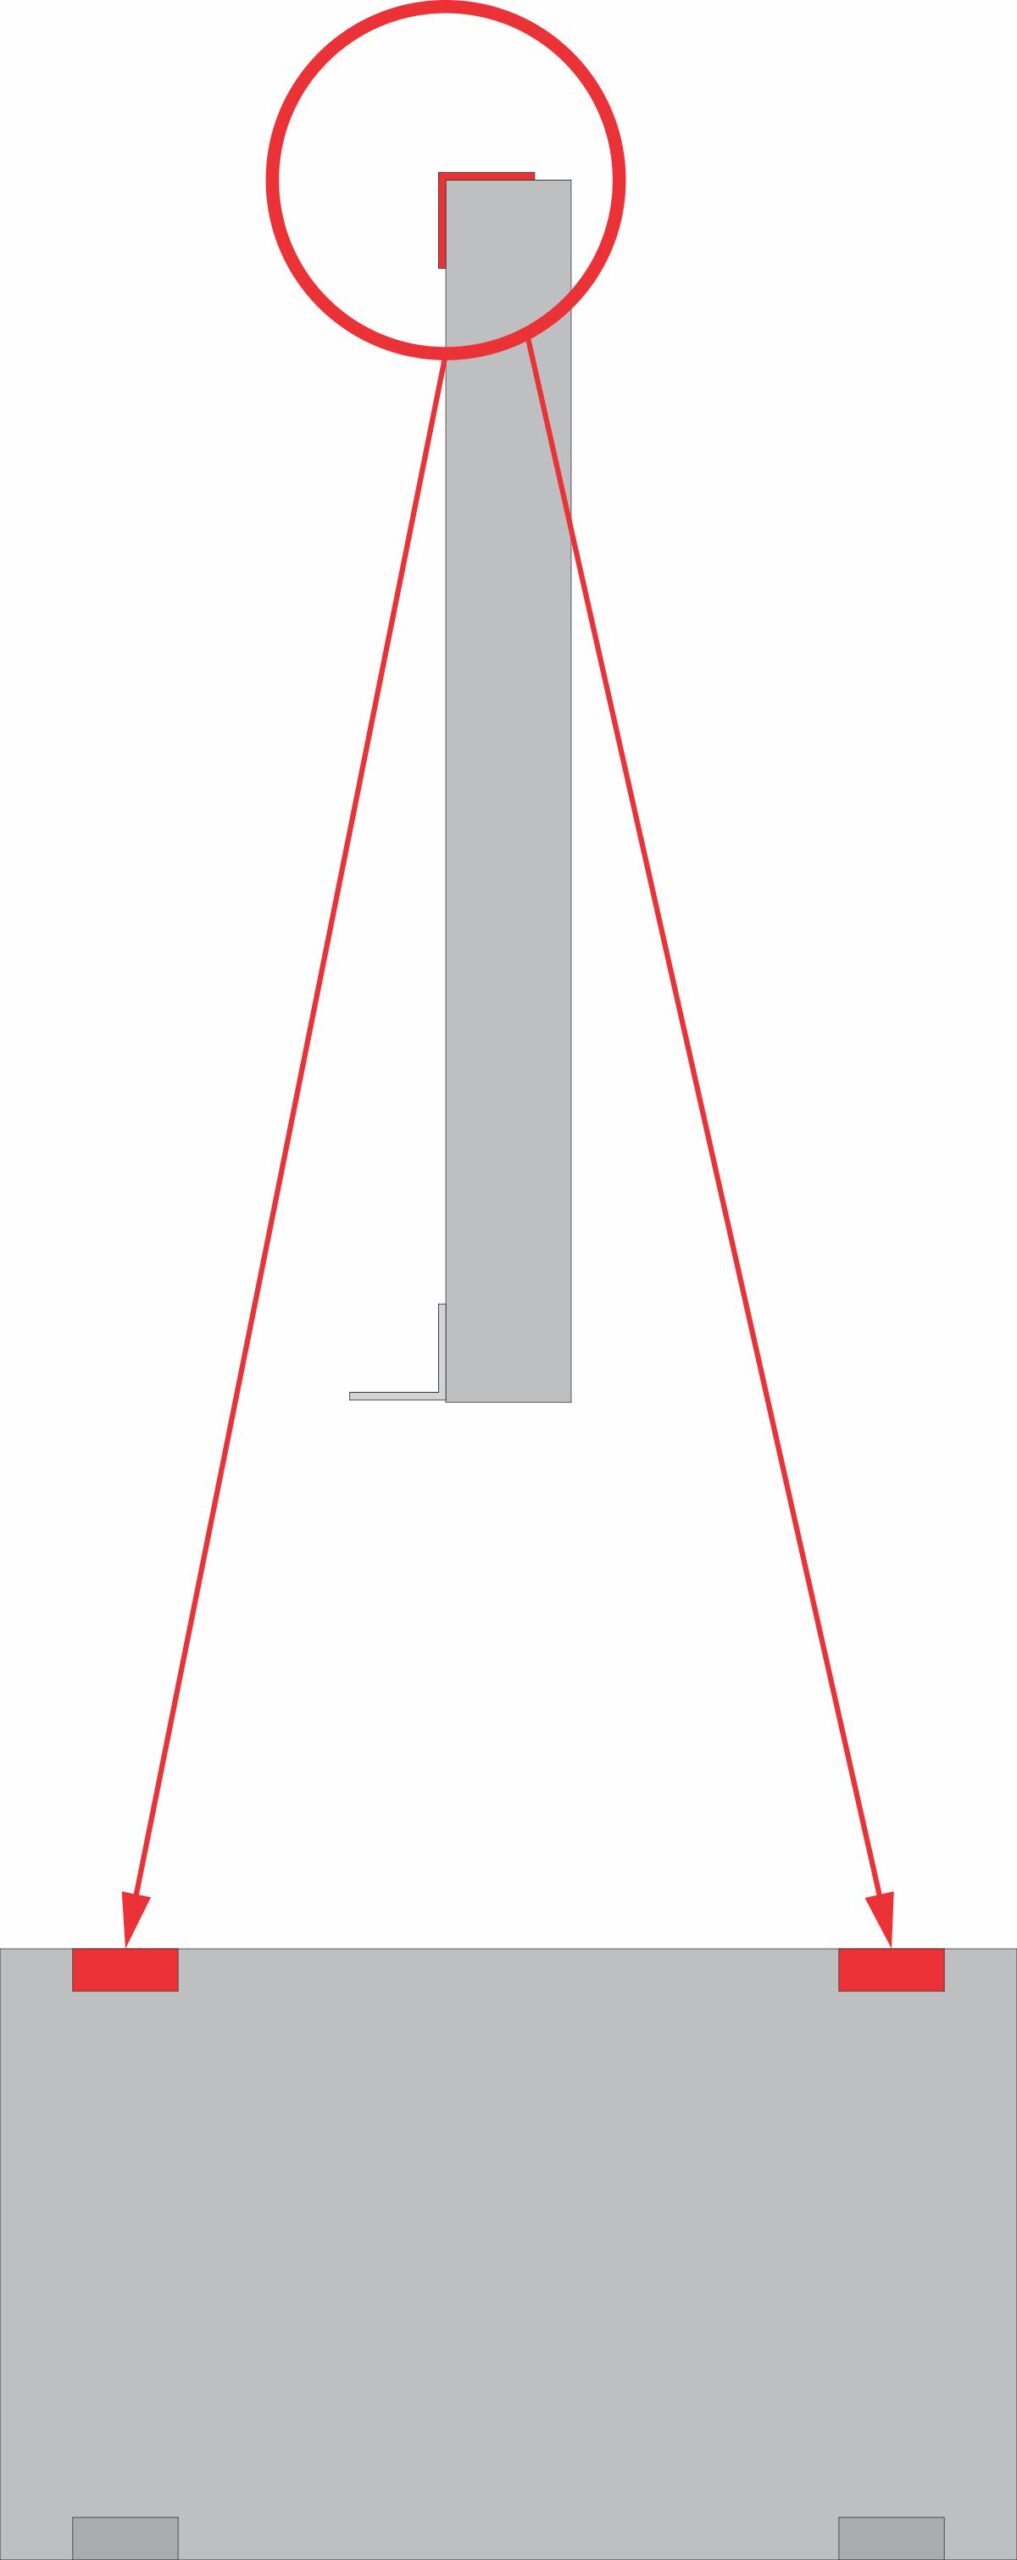
Step 4: Add Lifting Point
Install a lifting point at the top center of the lighted cabinet. For steel frames, simply wrap a lifting strap around the frame.
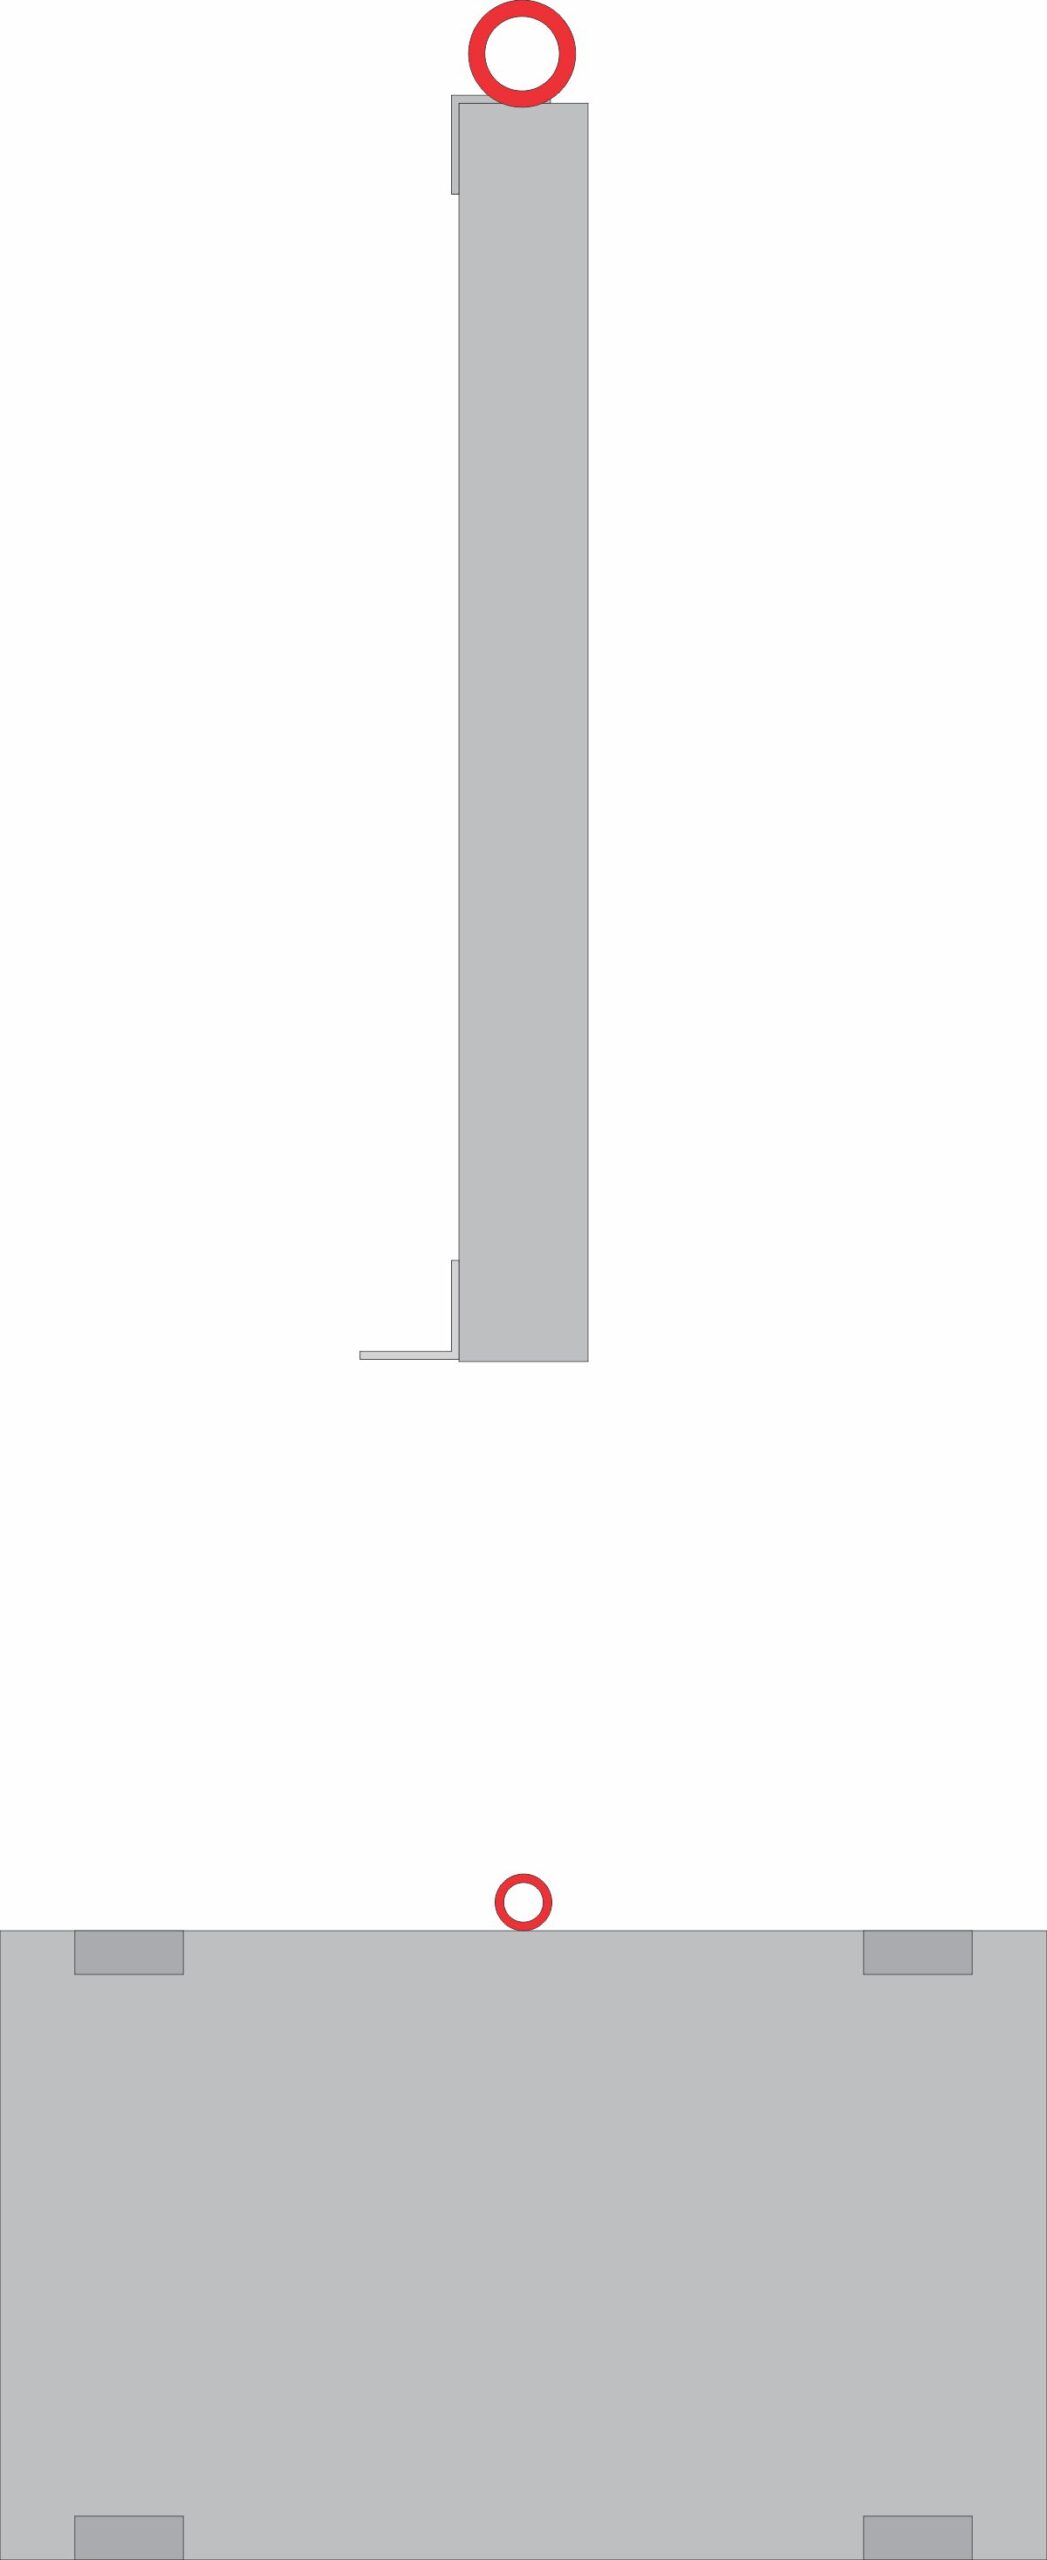
Step 5: Position the Sign
Install a lifting point at the top center of the lighted cabinet. For steel frames, simply wrap a lifting strap around the frame.
Once on-site, use a crane to lift and position the sign, ensuring it is centered and level. If the roof is wooden (with or without shingles), use wood lag bolts for attachment. If the roof is older, soft, or unsupported sheet metal, use bolts and unistrut (or leftover angle) on the underside of the roof for secure attachment. Mount the sign through the bottom angles attached in Step 2.
SEAL ALL ROOF PENETRATIONS WITH WEATHERPROOF SILICONE.
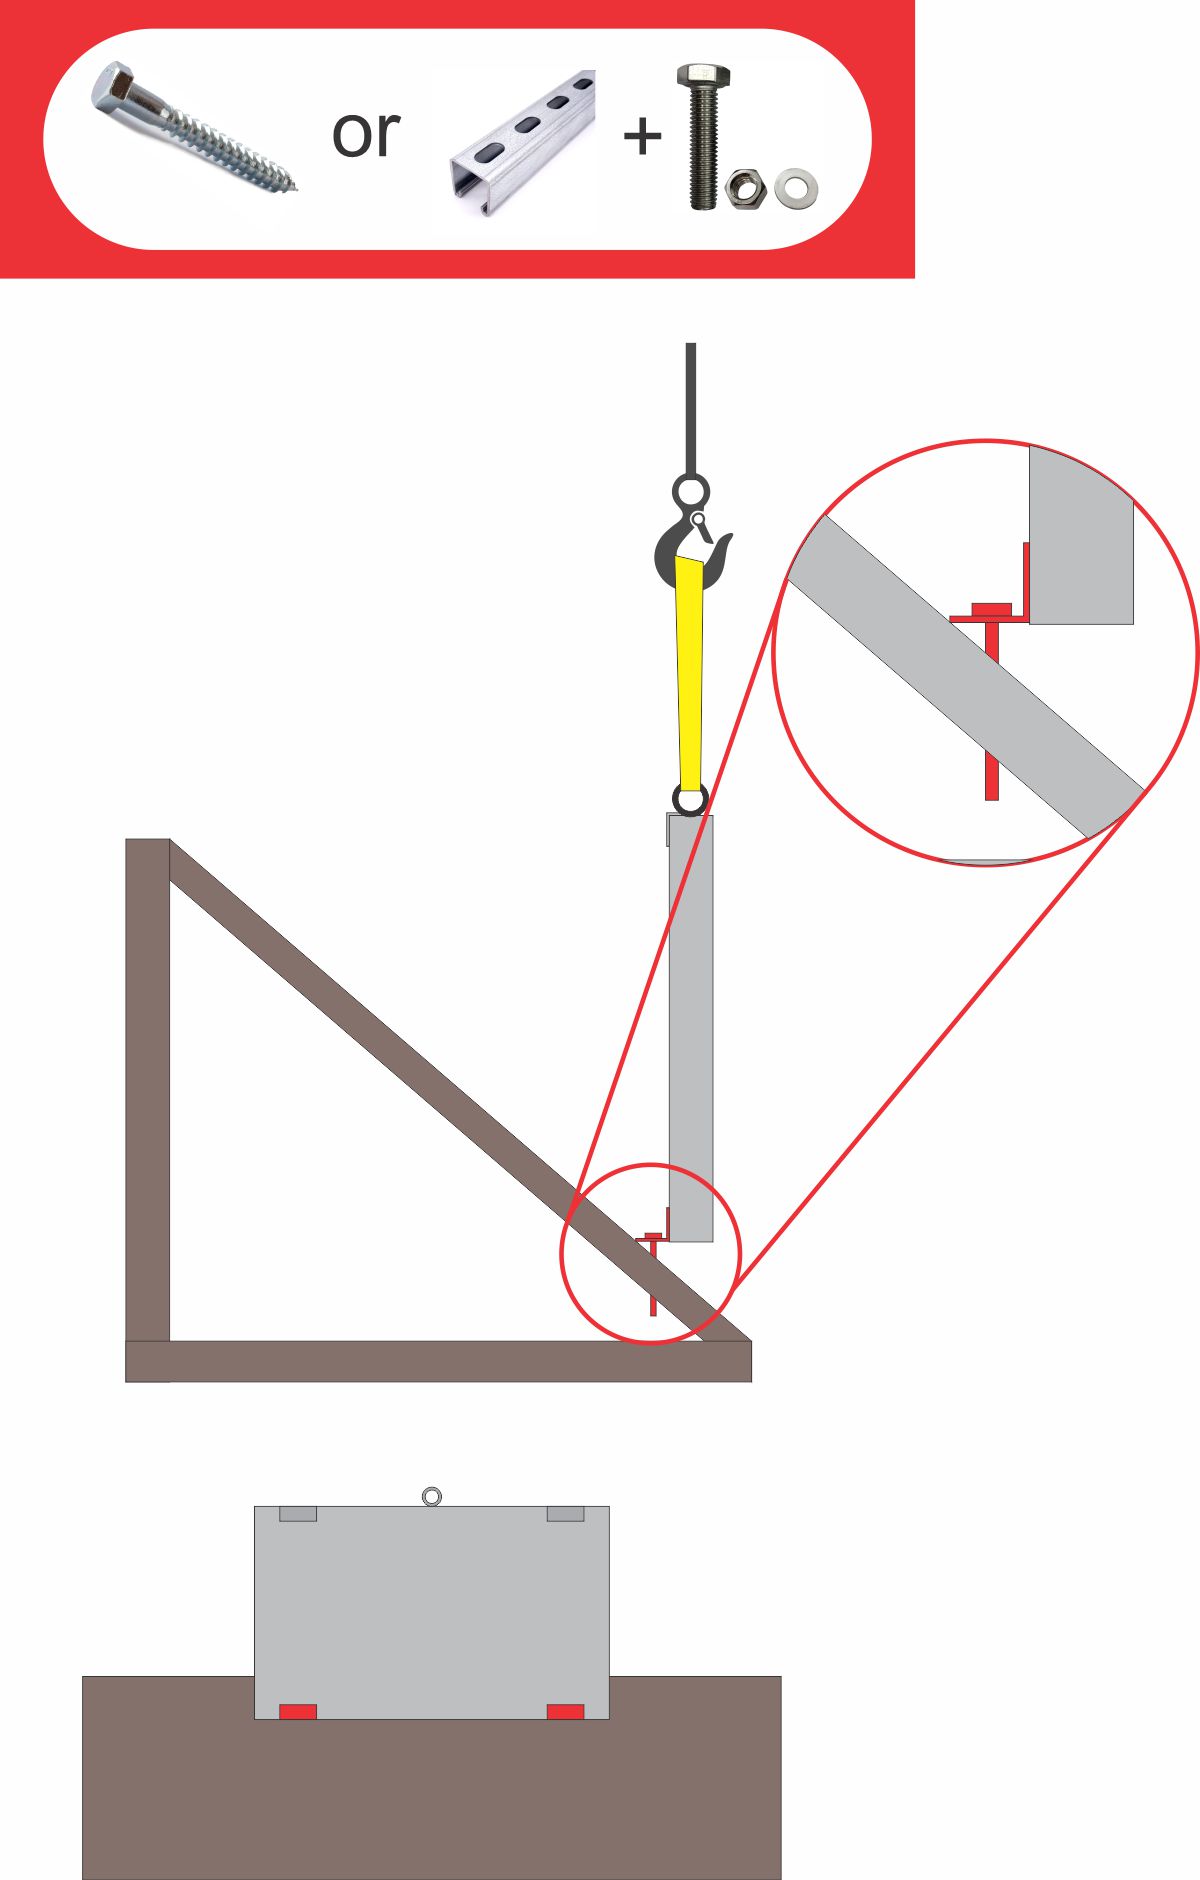
Step 6: Install Additional Angles
Install a lifting point at the top center of the lighted cabinet. For steel frames, simply wrap a lifting strap around the frame.
Using the (2) extra angles from Step 1, mount them approximately the same distance from the bottom mounts as the height of the sign. Align these by either measuring or eyeballing the center or edge of the top angles. For steel frames, position the angles 8-10” in from each end. Ensure the open side of the angle faces outward. Secure using the same hardware as in Step 5. SEAL ALL ROOF PENETRATIONS WITH WEATHERPROOF SILICONE.
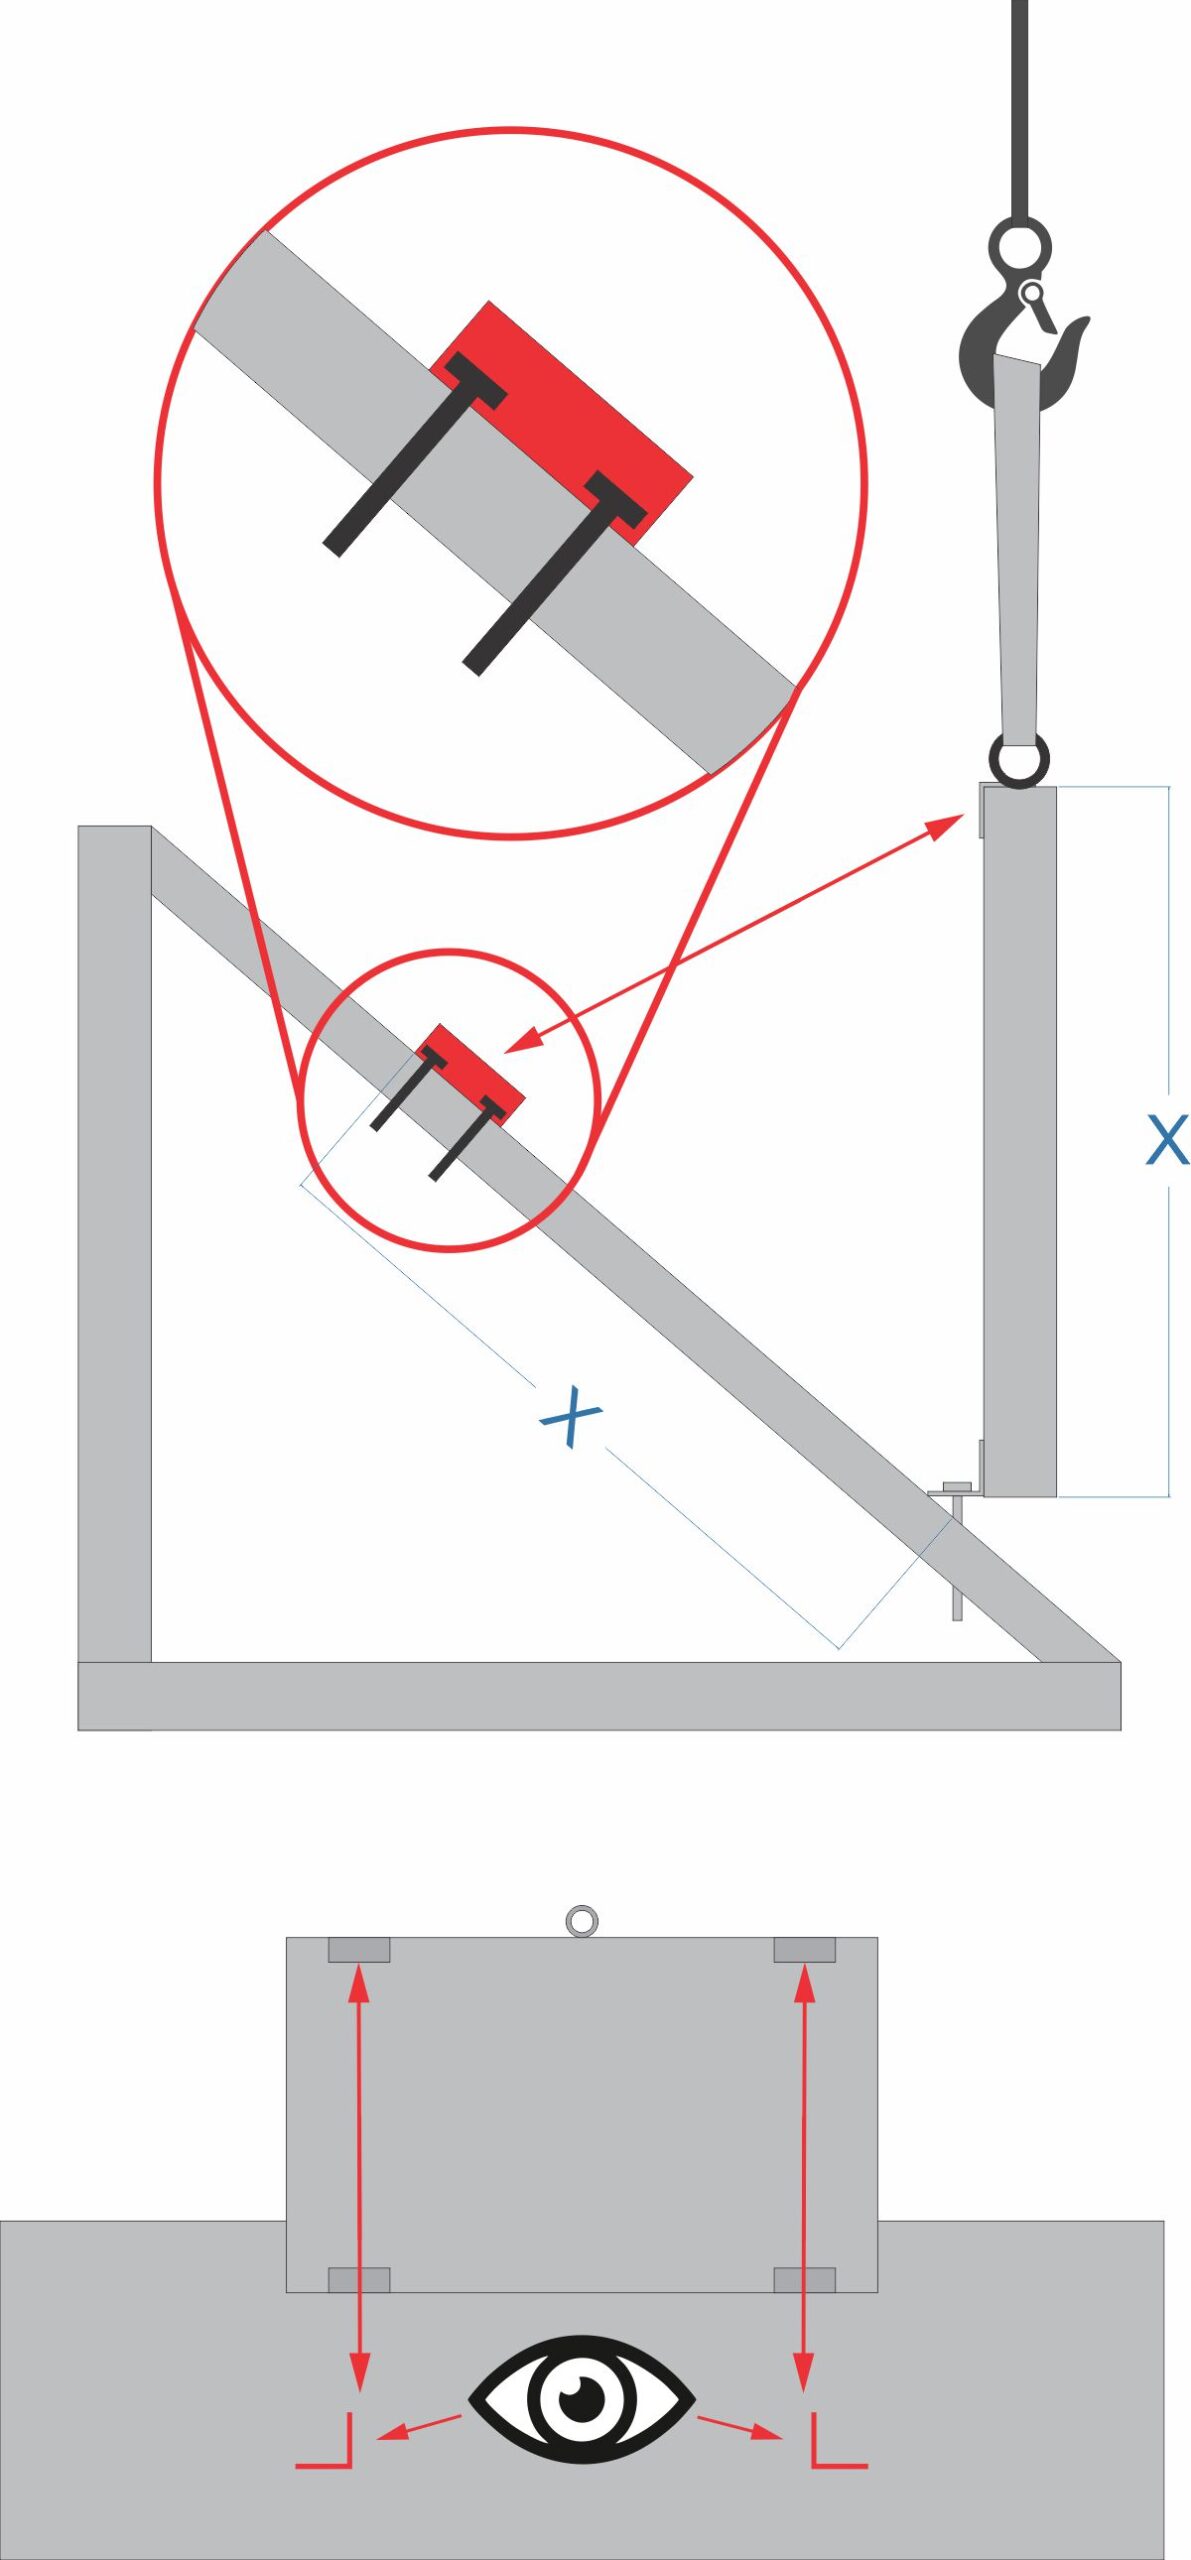
Step 7: Install Long Steel Pieces
Take the long steel pieces from Step 1 and hold them in place to determine the correct angle and length. Once cut to size, weld these pieces to both the top angle and the roof-mounted angles. Double-check that the sign remains level horizontally and vertically before welding.

Step 8: Final Touches
After confirming the sign is level and the pieces are securely welded, touch up all steel components with black paint, including any welds. If installing a lighted sign, connect it to the available power and test the connections, unless other arrangements with an electrician have been made. Install the sign face, completing the installation. Be sure to arrange for payment or confirm with the front desk. Take photos of the completed installation and send them to our email at info@highwaymansigns.com for our records.
